Difficulty
Easy
Steps
14
Time Required
00:45:00

User-Contributed Guide
This guide is not managed by the site's staff.
Tools
Parts
No parts specified.
-
-
Initially, before starting on any project on the front of the car, you would want to get it in the air. Supported by Jack stands.
-
There are various bolts on the back under tray that need to be taken off with a 10mm socket
-
There are 11 Bolts that have to be taken off to remove the black under tray.
-
-
-
After getting the rear under tray off, its time to move on to the front under tray.
-
Theres 7 black clips that require a flat head to pop out. Be careful not to break the head on these. Once they pop out, just pull them out of the hole.
-
After the Clips are out, go ahead and use the 10mm socket to get the bolts out. There should be (8) 10 mm head bolts holding up the under tray.
-
Once those bolts are taken out, the under tray will drop. Be careful not to damage the tray as it is a key item in the undercarriage of the vehicle.
-
-
-
To begin the removal of the Subaru BRZ Factory Exhaust you either need to get it off the ground on a lift or use jack stands to secure it above ground.
-
In the images we raised the car on a lift but one can easily secure the car on jack stands as well.
-
-
-
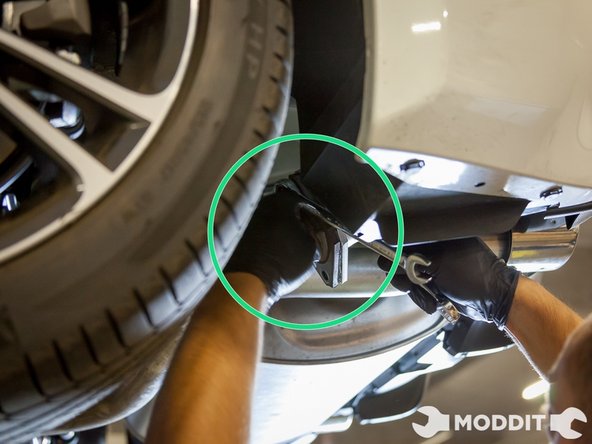
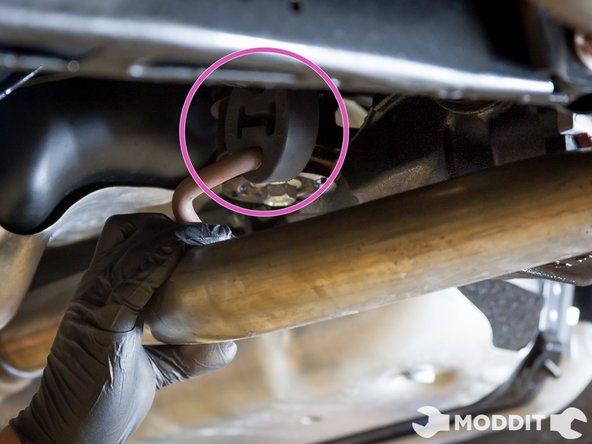
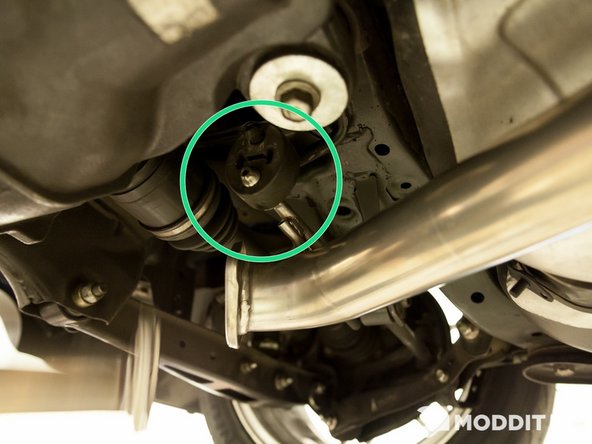
Start by removing the central OEM hardware first, shown here.
-
Our first step was to remove two bolts at the center of the center-most section (aka the Mid-Pipe) using one 14 mm wrench and one 12mm wrench.
-
The 14 mm was used toward the rear on the spring side of the nut while the 12 mm was poised towards the front of the car.
-
-
-
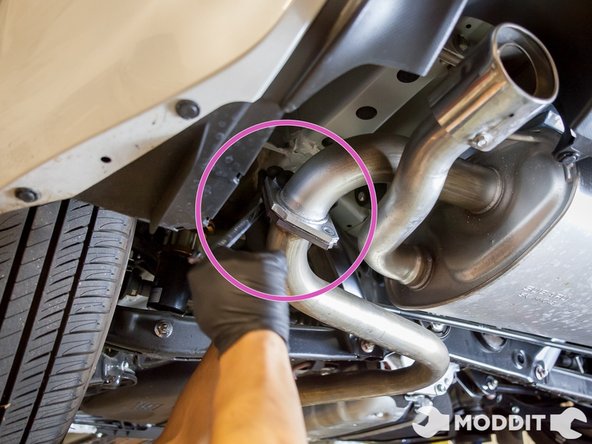
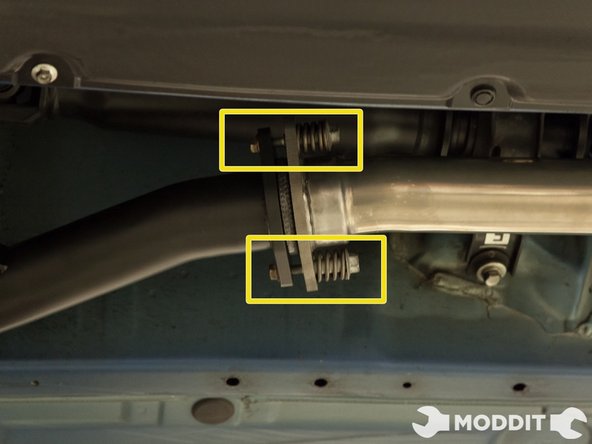
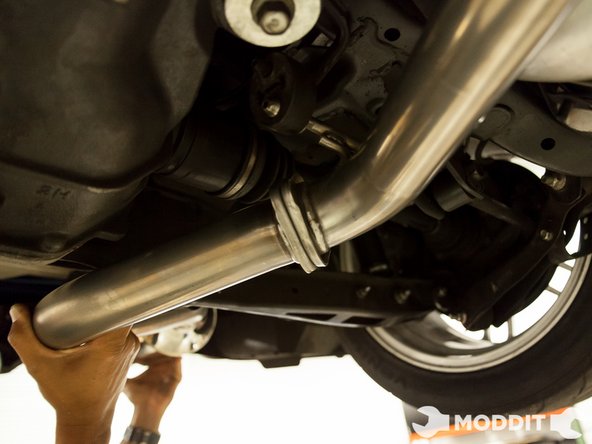
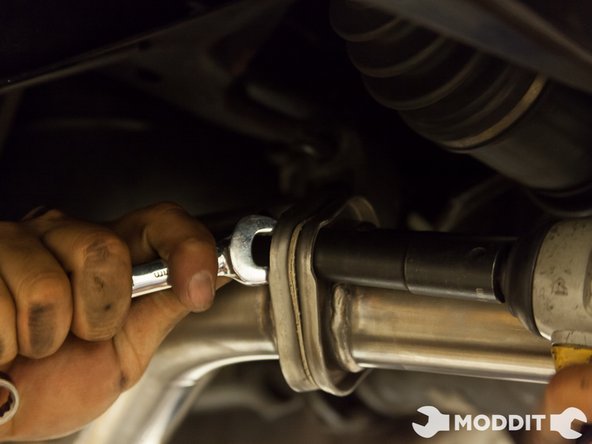
Go to the rear of the car behind the rear wheel to remove the bolts connecting the two sections of the exhaust (The Center/Mid-Pipe & Muffler Portion).
-
You will need to use one 14mm wrench and one 14mm rachet to remove the hardware from the center pipe to the muffler to disconnect it.
-
In some cases you will not need to reuse the rear hardware or exhaust gaskets, if your aftermarket exhaust does or does not come with one.
-
-
-
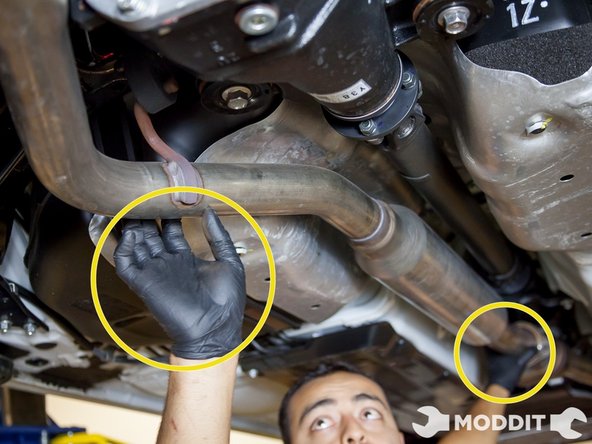
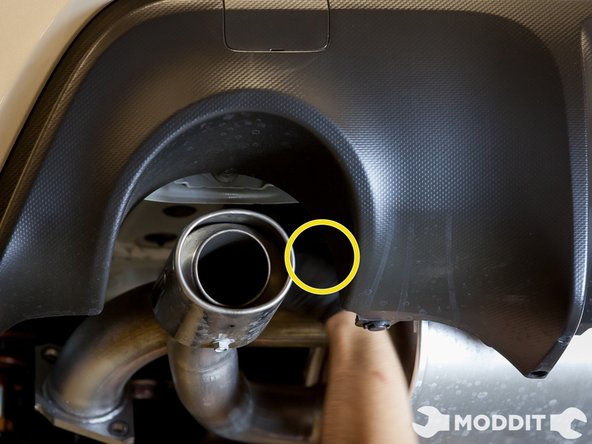
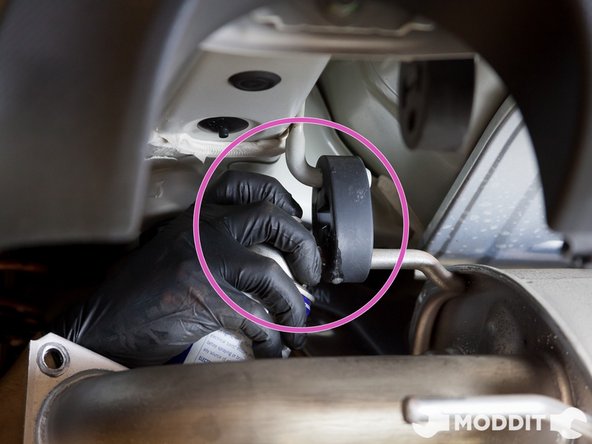
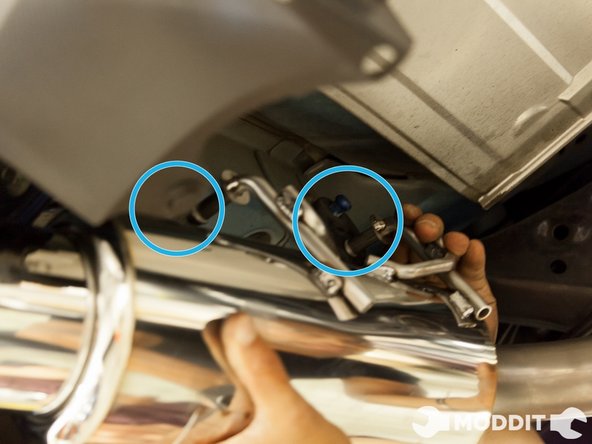
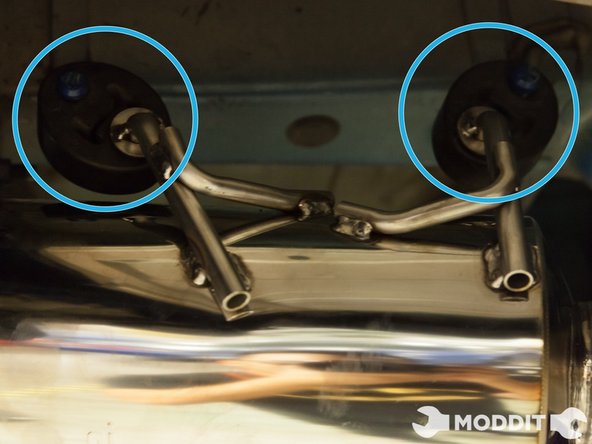
Remove the two exhaust bushings closest to the rear of the car first so that the exhaust tips do not swing up and hit your rear bumper.
-
Be sure to put some cardboard on the ground below your exhaust so you don't scratch the bottom of the exhaust muffler when it swings down.
-
Lubricant spray will assist in separating the bushing from the support.
-
-
-
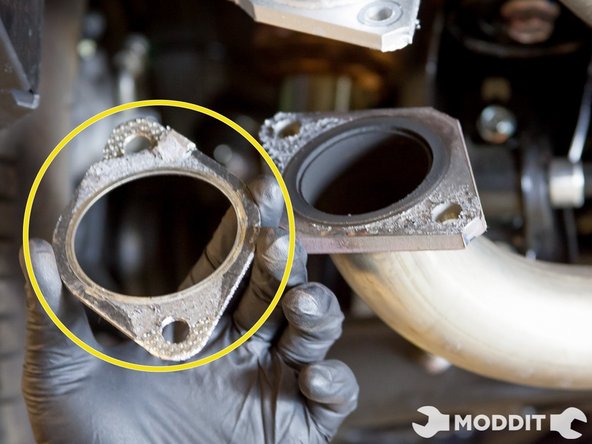
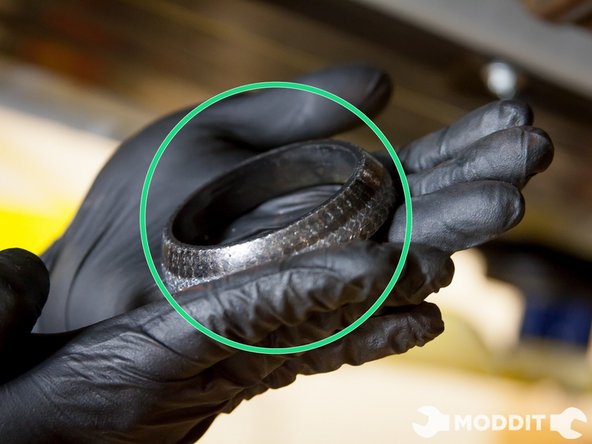
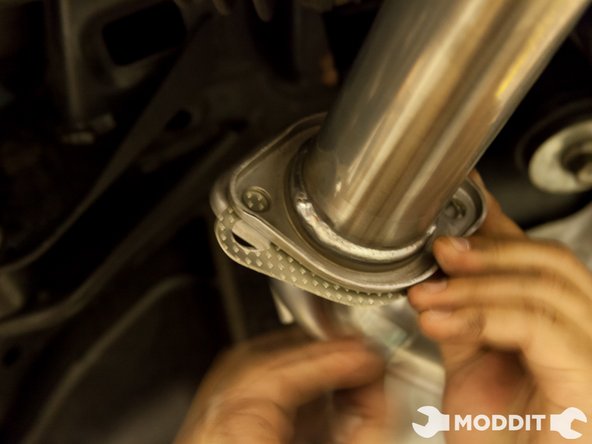
Before installation of your new exhaust, check the front exhaust pipe sealant bushings for damages as you will be reusing it.
-
At this point your exhaust should be fully removed and you should be ready to install either a replacement or aftermarket exhaust.
-
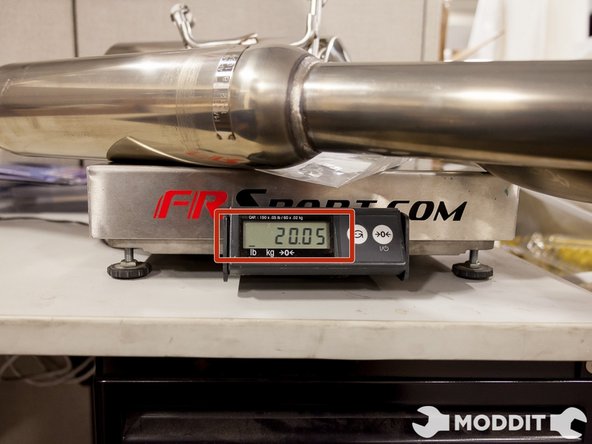
The stock Subaru BRZ exhaust comes weighing in at a total combined weight of 38.30 pounds. This includes both the mid-pipe and the muffler portion of the exhaust.
-
-
-
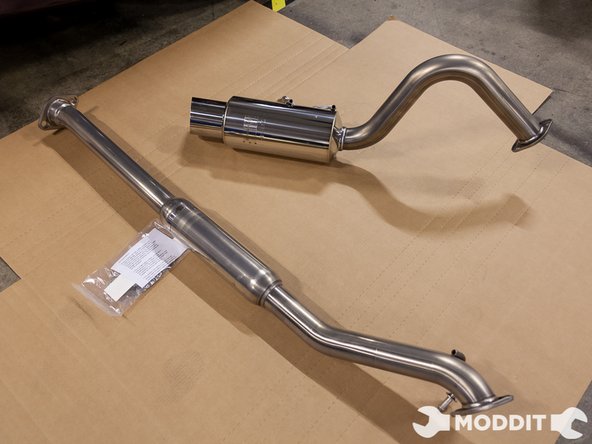
Unbox your Tanabe Exhaust. It should come with all new gaskets and hardware to install onto the BRZ/FR-S
-
The Tanabe Medallion is nearly 18 lbs. lighter than the stock exahust!
-
-
-
Position the mid-pipe in the stock location
-
Retain all your stock exhaust hanger bushings. You will have to reuse them when installing this exhaust.
-
Near the rear of the car insert the hanger busing and insert the exhaust hanger. This positions acts as a pivot point to help position the exhaust and alleviate the weight
-
Retain your stock exhaust spring nuts and bolts as they are also reused on the mid-pipe. Note: Pictured is an after market front pipe but it there should be no variation on installation on this particular exhaust
-
Check the stock exhaust gasket donut, if there is not marring or deformation go ahead and reuse and reinsert
-
Insert stock exhaust spring bolts and nuts. Hand tight for now; it aid in adjusting the exhaust positio
-
-
-
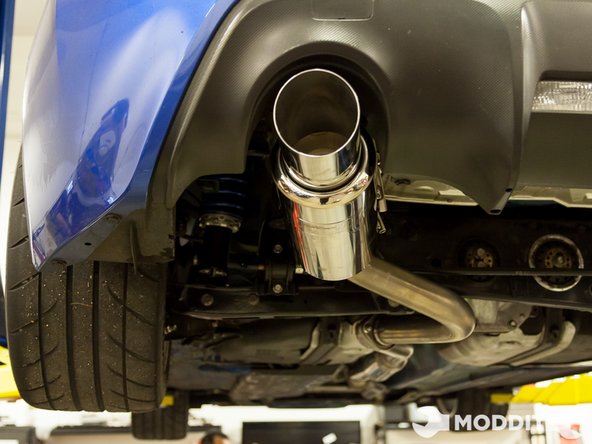
Mount the axle back portion of the exhaust
-
Again reuse the stock exhaust hanger bushings and hang the muffler. Since this a single exit exhaust only the driver side hangers will be used. Again this will act as pivot point for positioning
-
-
-
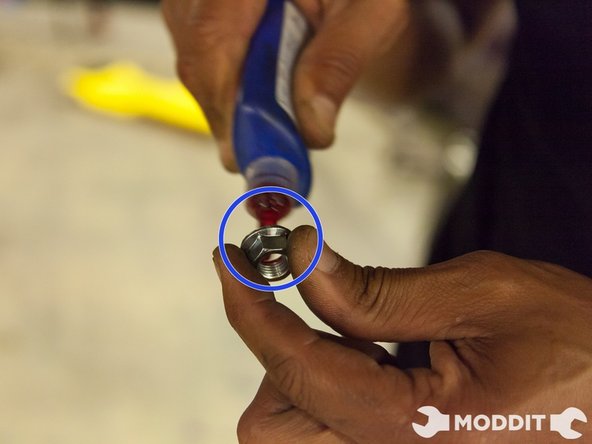
Since the full exhaust loosely mounted go ahead and slip in the provided exhaust gasket.At the same time insert the provided bolts to keep everything together
-
At this time it is a good idea to use loctite or any comparable thread locker the nuts for the exhaust
-
Tighten up the bolts
-
-
-
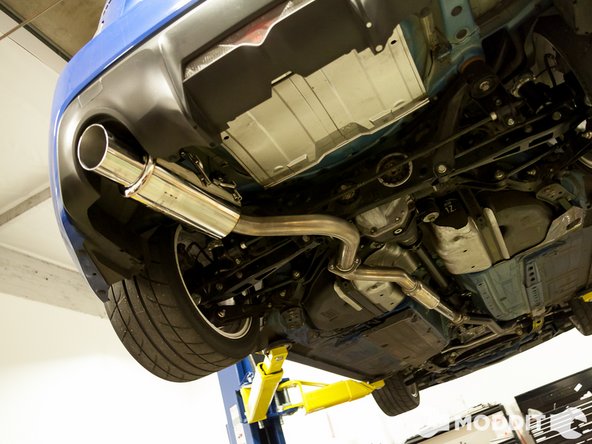
Its almost done! At this point the exhaust system is on. Sometimes the muffler looks a little skewed or not centered. If left the bolts loose on the mid-pipe and axle back, go ahead and position the exhaust in the desired orientation
-
While putting pressure on certain points, and if the exhaust is in the desired position, tighten the bolts while holding the exhaust in place.
-
These steps is not often required, you can tighten everything up and fit perfect. The preceding steps will work for most exhaust installs
-