
Tools
No tools specified.
Parts
-
-
Installing the Stance sub-frame collars on the BRZ is one of the easiest installs you could do. The install reinforces the bushings at the four contact points in the sub-frame and allows for better road control. The few following steps will take you through the install.
-
The very first thing you will have to do is raise your car on a lift or jack the rear section of the car according to FSM specifications and jacking points.
-
-
-
Because there are only four sections you will have to unbolt and then bolt up again. The install is fairly quick.
-
To begin, we will start installing the two front sub-frame collars.
-
In order to ease the install you will have to loosen these bolts and metal panel, so as to not expose it to unwanted forces.
-
On the passenger side you will also have to loosen an under-body panel
-
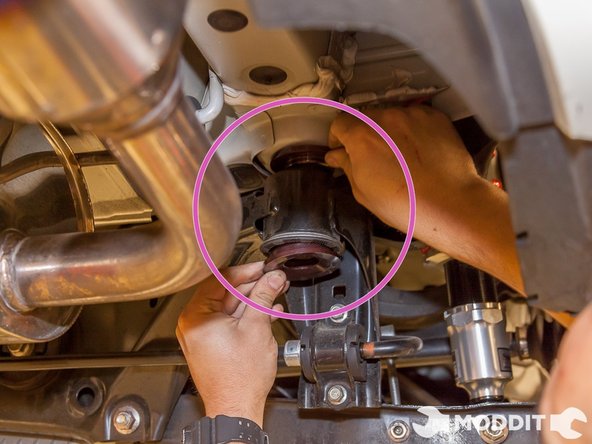
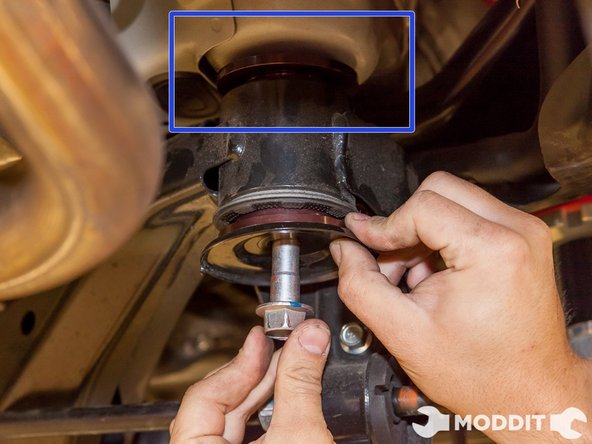
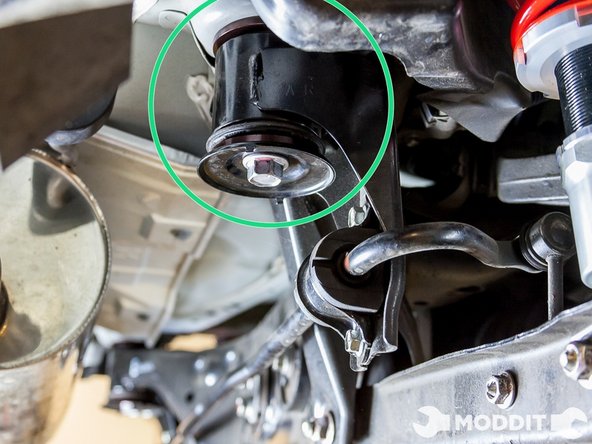
Following the loosening of the bolts mentioned above proceed to remove the first large bolt pictured here.
-
-
-
Once the larger bolt is out of the way (you can remove it completely as the sub-frame wont' come falling down) you can begin wedging the Stance Sub-frame collars into the correct spots.
-
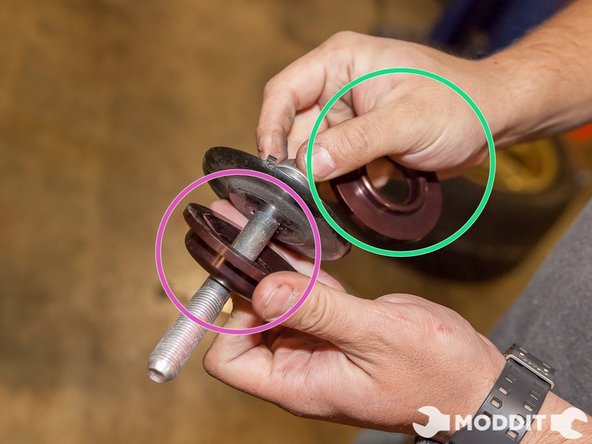
You will notice that the collar with the thickest ridge goes on the bottom.
-
The collar with the smaller ridge goes on the top section of the sub-frame bushing.
-
-
-
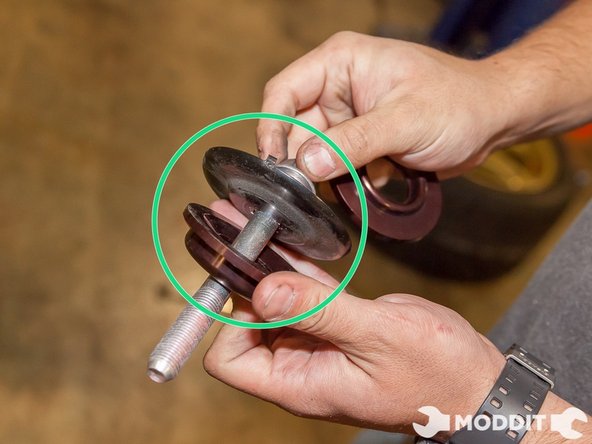
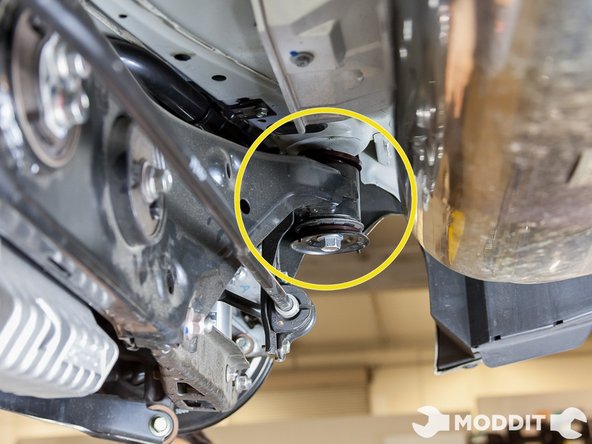
In this image you can see how the assembly of the collars should look like.
-
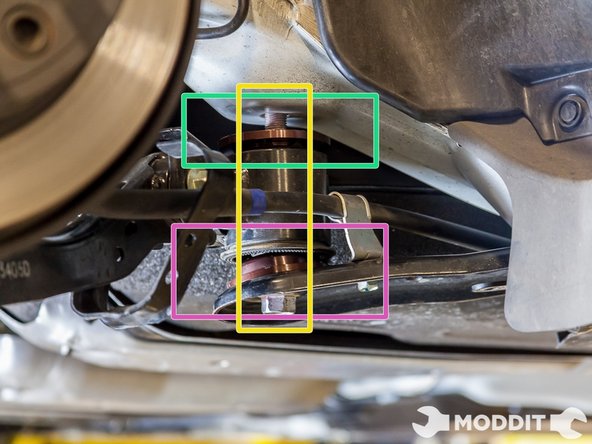
The top collar is simply wedged in between the top of the front sub-frame bushing and the vehicle's body.
-
The bottom collar also must slide in, except you will be wedging this lower collar in between the bottom part of the front sub-frame bushing and the metal support panel you loosened in step 4.
-
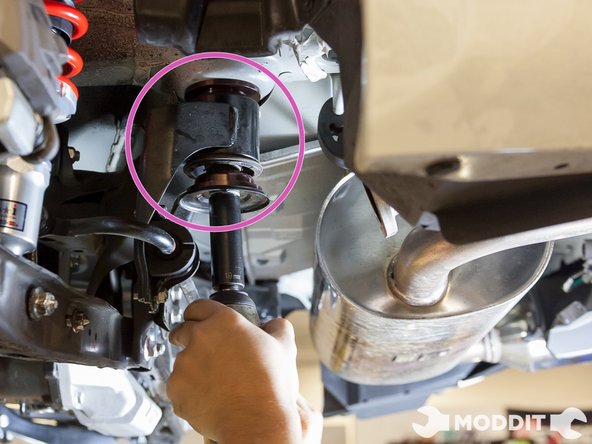
Once all collars are facing the correct way, slide the bolt up and in between all collars and bushing to tighten up to FSM specs.
-
It is very important to note that the thicker ridges of the collars must be facing towards the sub-frame bushing and the flat parts away from it.
-
After you have repeated these steps to the opposing side you are ready to install the rear-most sub-frame collar bushings.
-
-
-
The install of the rear sub-frame collar install is a lot more straight forward. Unlike the front portion where you had to loosen a panel to loosen the sub-frame area, here you just un-bolt and re-tighten; read on to see how.
-
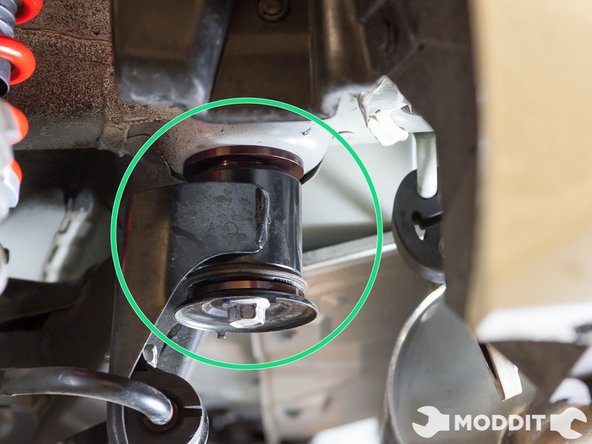
Using your ____ Socket, loosen the rear main bushing bolt from the body. This area is located right behind the exhaust muffler. Here after loosening the bolt we posed how you should layout the collar bushings.
-
Because we had previously installed the Tomei Type-60R exhaust which has no muffler, our area to access the rear sub-frame bushing bolts was fairly open. Keep in mind you might have to remove the stock muffler if it is in your way.
-
After holding the sub-frame collars in the correct position to demonstrate their final placement locations, we then slid the bottom collar in first.
-
After securing the lower collar in place on the bolt, we then placed the top collar so that the bolt would pass through both sub-frame collars and the sub-frame bushing.
-


Cancel: I did not complete this guide.
One other person completed this guide.

One Comment
This step-by-step makes this job sound like a breeze which it isn’t. Look at YouTube to see how difficult it is..
This step-by-step doesn’t mention that as soon as the large subframe bolts are removed the subframe moves out of alignment meaning getting the bolts back in is a major job requiring physical manoeuvreing one corner at a time. Because the bolts go thru a two inch long tube before the thread starts on the frame the alignment, vertically, is extremely important.
On top of that the bolts are a very fine thread that is VERY easily cross threaded. The bolts need to be aligned EXACTLY, and done up by hand to the point where they are virtually fully seated before even thinking about using tools and never use air tools.
The results are worth it but dont think that this is a simple remove, install, and retighten bolts.
Allow four hours…
Steve Bodalenko - Resolved on Release Reply