Tools
No tools specified.
-
-
The very first thing you have to do raise the car. Yes we had a lift so it made it even easier, but most of you will use a jack and some stands. It is important to keep the car level as the drain hole is not fitted more or less to any side.
-
-
-
Next gather all the supplies one would need for the oil change. We used (5) Torco SR1 0W-20 Synthetic Oil as is recommended in the Subaru Owners manual, an OEM Subaru Oil Filter (P/N 15208AA130), an OEM Subaru Crush washer (P/N 803916010), and a small funnel Koyo Radiators let us borrow hehe.
-
We also took out a 14mm ratchet which was the only tool we would end up using. Also we recommend you have a rag nearby in case you spill any oil as well. We have yet to meet a person that does a super clean, no mess oil swap.
-
Before you start raising the car open up the oil cap in order to expedite the process of leaking the oil out.
-
-
-
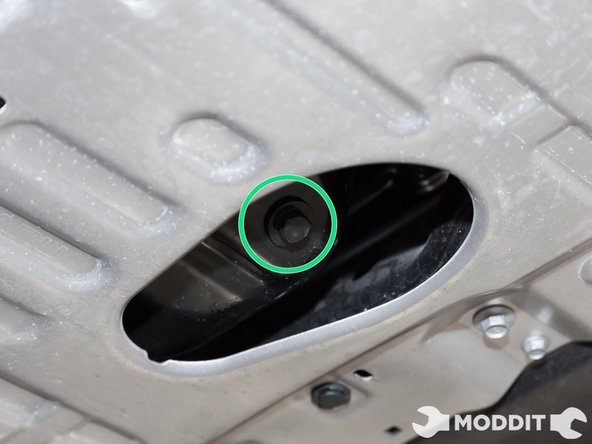
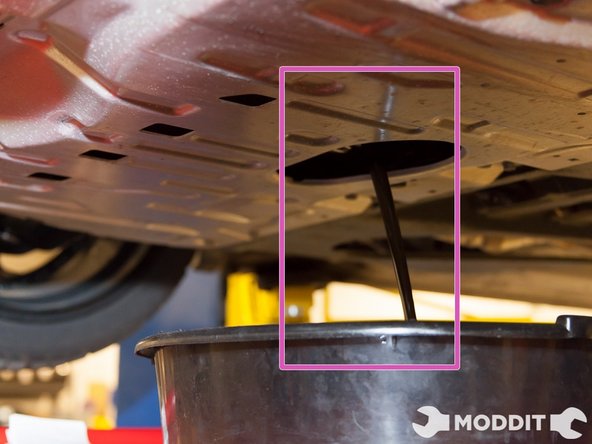
Once the car is raised position the oil capturing bucket right below where the oil escapes.
-
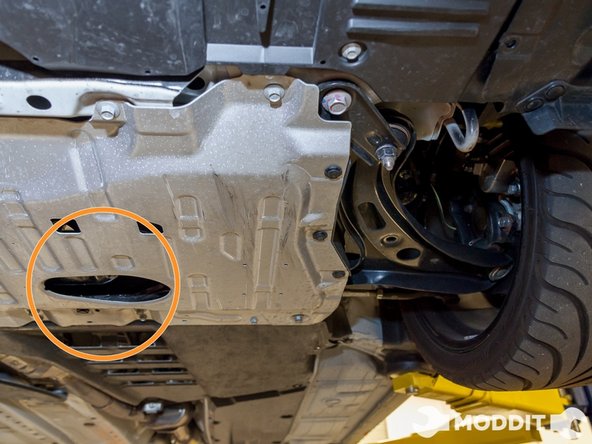
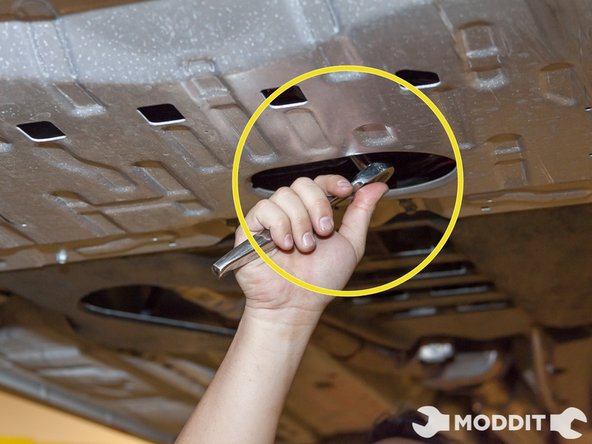
This outlet is extremely easy to find. One has to simply locate the front, under-engine cover and a hole where the access point is will be clearly visible.
-
start unscrewing the bolt and begin the process of leaking out the oil.
-
-
-
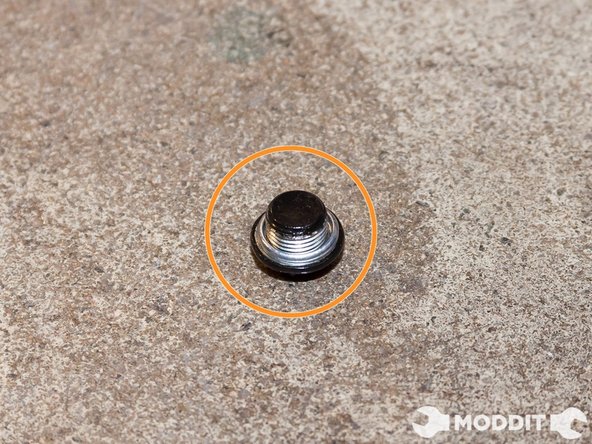
Begin preparing the Oil Drain Nut with the Subaru crush washer
-
“BE CAREFUL” and observe that you really do remove a crush washer from the drain plug, reports from fellow enthusiast have come up noting that the washer and plug sometimes come painted together.
-
This could lead you into believing that there is no crush washer in the first place. We, however, we’re pretty confident that there was not one there.
-
-
-
After all the oil is completely out start putting the drain bolt back on. When replacing the nut you will find that there is quite a bit less thread before you continue to turn the nut into place. This is because you added the crush washer and simply needed to turn harder; it is called a crush washer for a reason.
-
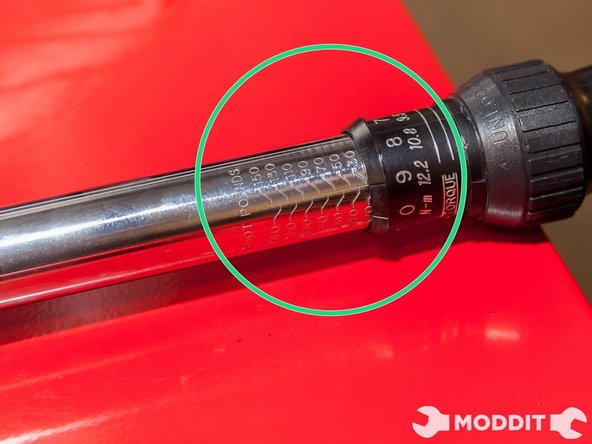
The recommended tightening torque according to the Subaru Owners manual is 28.9 ft-lb. Keeping to this torque ensures easy removal next time you need to swap the oil again.
-
After the drain bolt is securely tightened lower the car and begin removing the oil filter. Most of the time one can simply remove it by hand. If you happen to have an oil filter removal tool the better. The filter takes an 80mm tool in case you want to get one for yourself.
-
Move on to remove the filter by hand after breaking it loose and sit it down next to your new one.
-
-
-
We then began to prep the new filter. We got some of the used oil (or you can use the new oil) to lubricate the new one and ensure a secure seal. Next we simply hand tightened the new filter as only 10.3 ft-lb of torques is needed to secure it on.
-
DO NOT over tighten the filter however as it may become deformed and ultimately leak out all over the place.
-
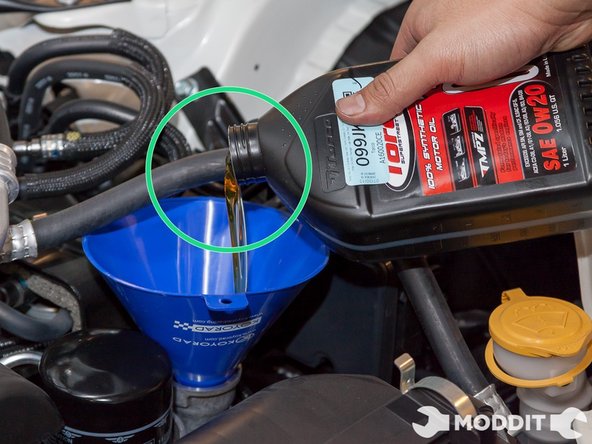
Once this was done we proceeded to adding the oil. The exact amount used for the oil change was 5.4L or 5.7 U.S. Quarts. Make sure you use a funnel as it clearly helps in keeping things clean.
-
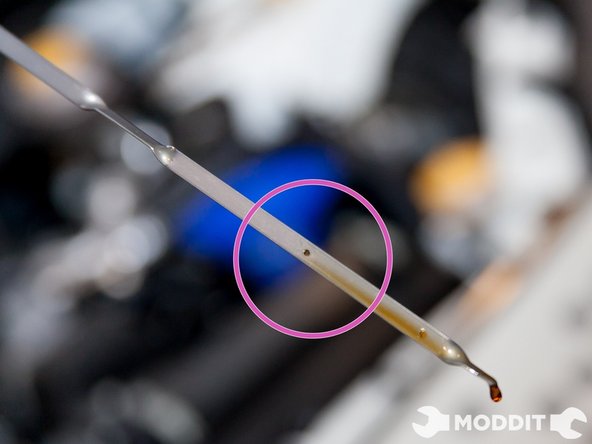
Finally check your oil dip-stick and verify that the oil is at the correct level. Nailed it!
-
-
-
Finally secure the oil cap and run the car for a bit. Running it helps to determine if there are any leaks. If nothing drips in 5 to 10 minutes we’d say that you are in the clear. We noted how many miles were in our BRZ, created a reminder on our cellphones for the next oil change, and were finished.
-
This definitely has to be one of the easiest oil changes you will ever have to perform.
-