Difficulty
Moderate
Steps
14
Time Required
02:00:00 - 03:00:00

User-Contributed Guide
This guide is not managed by the site's staff.
Introduction
In this article, we will install Stance ST-ZN6-XS Coilovers on the FRSport Subaru BRZ. This article is also applicable for other coilovers and the Scion FR-S. While we are at it, we will be upgrading the springs to Swift springs for more consistent spring rate throughout stroke, more stroke, and less overall weight.
As an added bonus, since we will be tracking this vehicle as well, we will be corner balancing and aligning it in-house (steps not shown in this article).
Tools
- floor jack, jack stands OR car lift
- 1/2" ratchet, 3/8" ratchet, and ratchet extensions
- 12mm, 14mm, 17mm, and 19mm sockets and combination wrenches
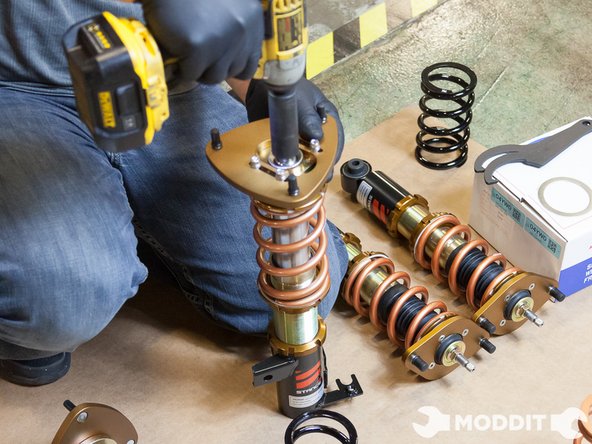
- Impact gun (optional: makes for easier removing of retaining nut on coilover)
- 6mm allen wrench for sway bar end links
- pliers or vise grip to hold coilover shaft when removing retaining nut
- pry bar for rear suspension (if needed)
- a buddy/victim to help
Parts
-
-
Prepping the Coilovers for Installation: The first thing to do before installing anything is to get your tools, coils, and vehicle ready. Start by removing the trunk interior before anything. This way you are clean of interior panels.
-
Remove the trunk liner first. It’s interesting to note that on the Subaru BRZ this super heavy duty liner is included. Well at least on the limited version we found this to be true.
-
Use a pick or flat-head screwdriver to pry up the retaining clips on 3 separate interior panels in the trunk. Remove the center rear panel first to make taking the side panels out easier; there were a total of 4 clips on the rear there.
-
Be very careful not to break any clips because the moment you pull the wrong way these clips can break off.
-
-
-
On the BRZ, there are also 6 retaining clips per side panel, so a total of 12. On an FR-S we have read that there are only 4 clips so its an interesting difference. After each clip is pried up, the clips should be removable by hand.
-
The BRZ also has a Remote Trunk Release Cancel Button plug to disconnect on the driver side interior panel. After we had pulled the driver side interior cabin panel off we noticed we couldn’t completely remove it out of the way because we had to disconnect this small gadget.
-
A very useful button indeed in case someone hijacks you and throws you into the trunk haha.
-
-
-
The next thing to do is replace the springs. If you are following this as a guide but you are not replacing the springs, you simply have to check the torque/tightness of any nuts/bolts used on the coilovers and move on to the “REAR SUSPENSION REMOVAL & INSTALL” in step #8.
-
We know that Stance is an amazing company and that their products are equally amazing, but its ALWAYS a good idea to check the tightness of your suspension pieces before it goes in.
-
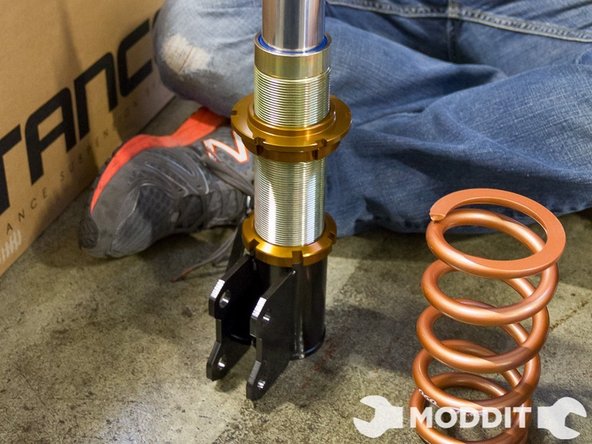
Lower the collars so there is no tension on the springs and to prevent the spring from flying toward your mug. At this point its also a good idea to select your preferred initial height.
-
-
-
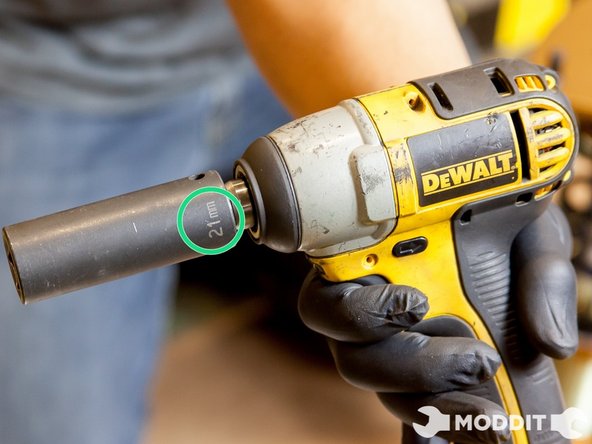
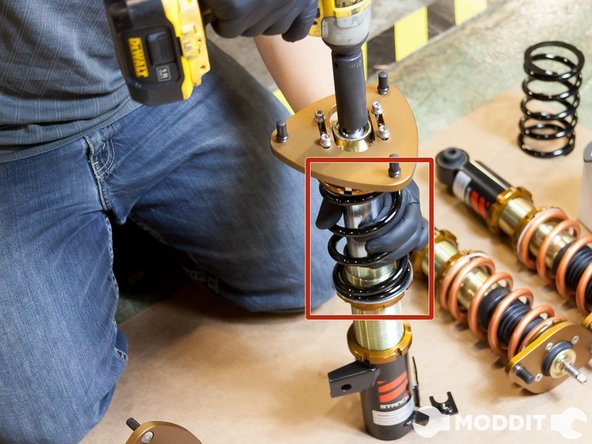
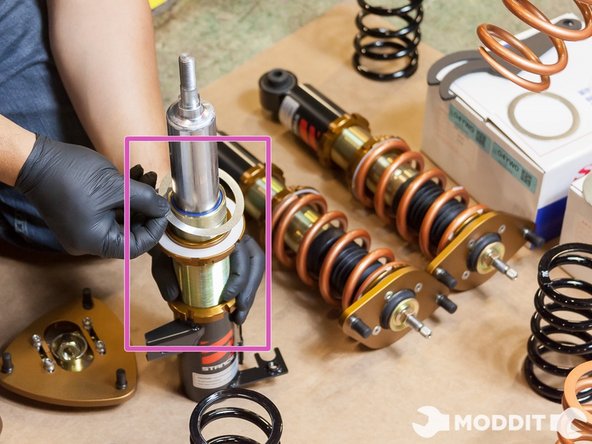
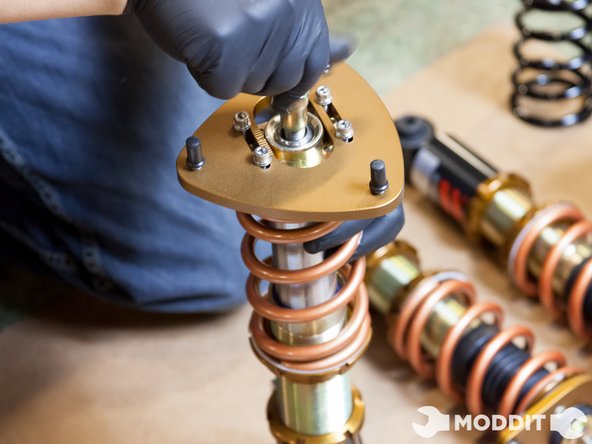
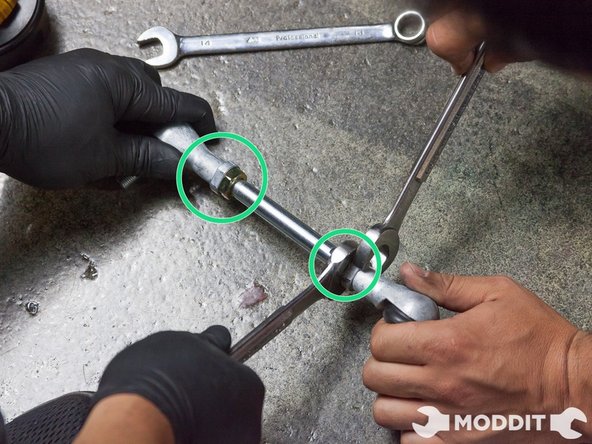
If you too are replacing the Springs move on to loosen the 21 mm nuts retaining the top hats to the coilovers. Be sure to use a plier or wrench to keep the shaft from rotating when loosening the top nut.
-
In the images, we show us just using on our hands but then realized that it would be better for the benefit of the coilover to be held with a wrench rather than just our hands.
-
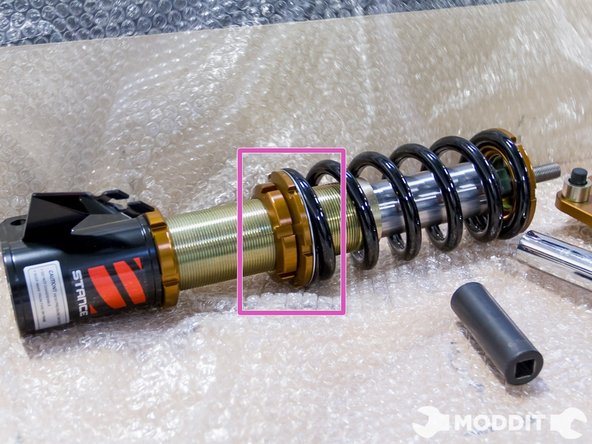
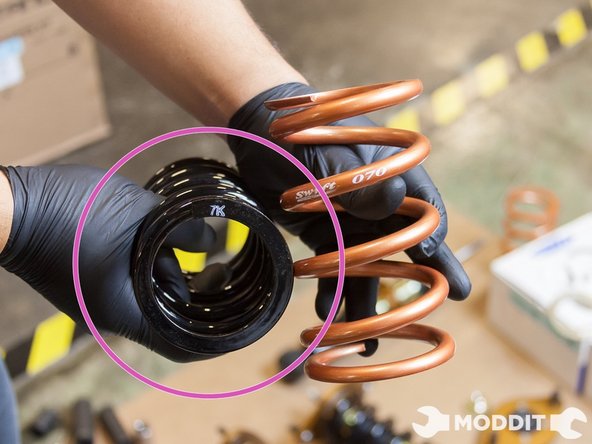
Included with the coilovers are these metal and plastic washers to help the springs seat better and reduce binding. Make sure you leave the metal wahser closest to the spring followed by the plastic one. The combination of these two washers allow for the proper movement of the spring.
-
-
-
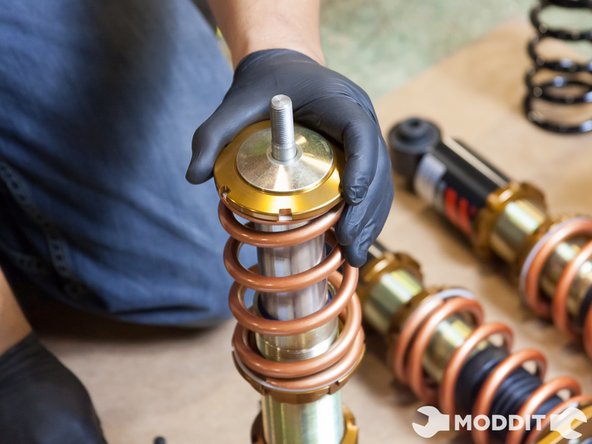
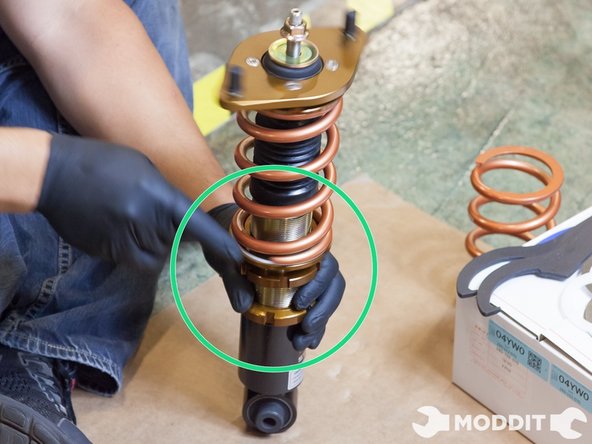
Upon reassembly, we tightened the collars back on until there was no play in the springs, then we tightened it one more turn. There are different preferences in setting preload so feel free to set it to your preferred setting.
-
-
-
We chose to use 6 kg/mm Swift springs in front & 7 kg/mm Swift springs in the rear, which are the standard spring rates that come with most coilovers. You can go stiffer or softer depending on your personal preference and the guys over at Swift Springs will move heaven and earth to get you the preferred settings you require.
-
Finally, once our coilovers have been assembled, we picked an initial ride height by loosening the lowest collar & spinning the housing as necessary. Make sure that the same is done for all sides in order to reduce changes once the coilvers are on the car.
-
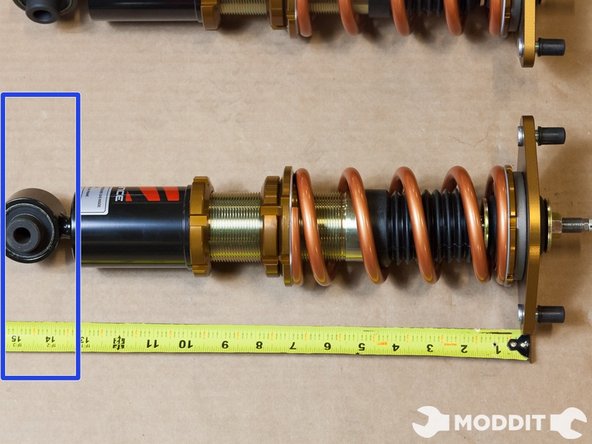
For initial ride height, we used whatever came from Stance. Our front coilovers were set at 16.25″ to 16.5″, measured from the top of the top plate (ignoring the studs) to the center of the bottom strut mounting bolt. The rear coilovers are set between 14.75″ to 15″, measured from the top of the top plate to the middle of the bottom eyelet.
-
Some coilovers can go super low but we decided to keep the stock height and then adjust as needed once the coils were on the car.
-
-
-
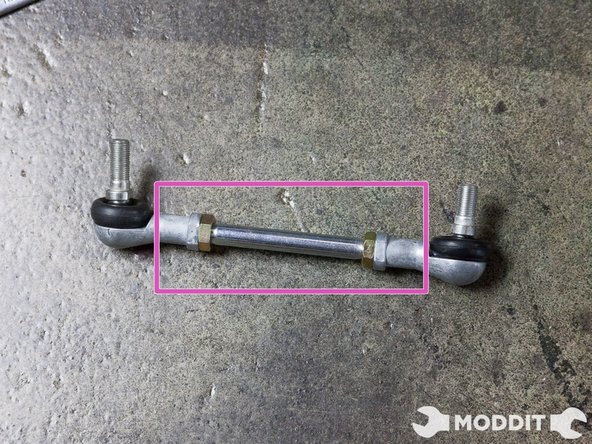
An essential thing to note as well is that Stance provides replacement sway bar end links with their coilover kits – sweet! You will find out that because of the new geometry introduced by these coilovers, you will end up needing them.
-
Its also a perfect time to make these replacement sway bar end links face the same way. Out of the box they come facing the opposite way but will not go on like that.
-
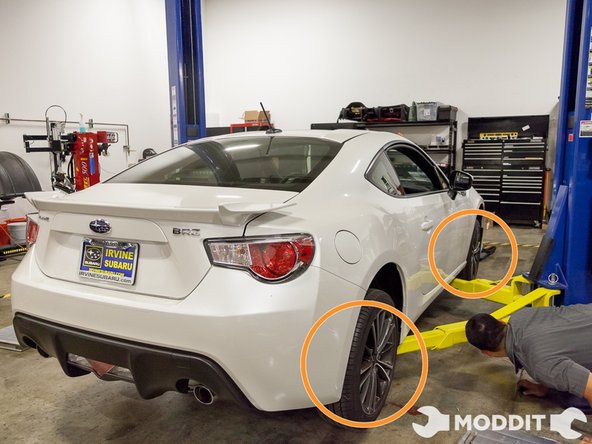
After all this prep we were now ready to begin the install (finally haha). We got the vehicle up in the air with our car lift, then loosened the lug nuts on our BRZ. We mainly used an impact gun for most of the loosening of bolts/nuts, however you can use ratchets and/or wrenches if you don’t have an impact gun.
-
-
-
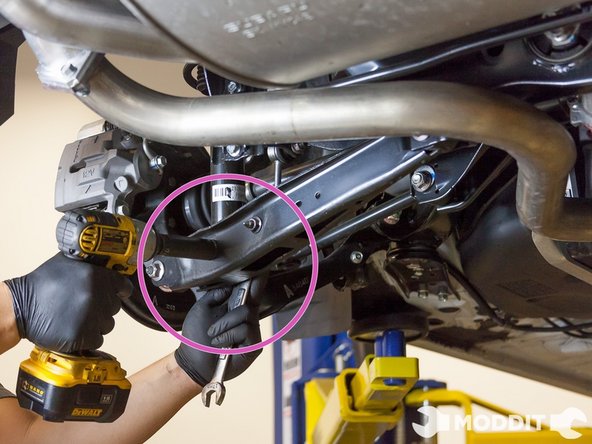
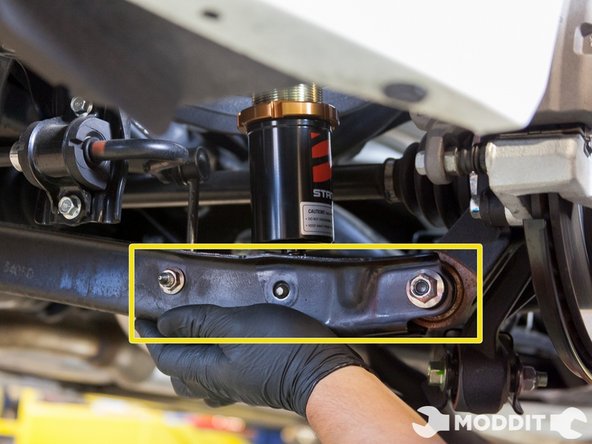
Removal/Installation of the Rear Suspension: We started first with the rear section of the car. We removed the 17 mm nut holding the strut to the lower control arm.
-
-
-
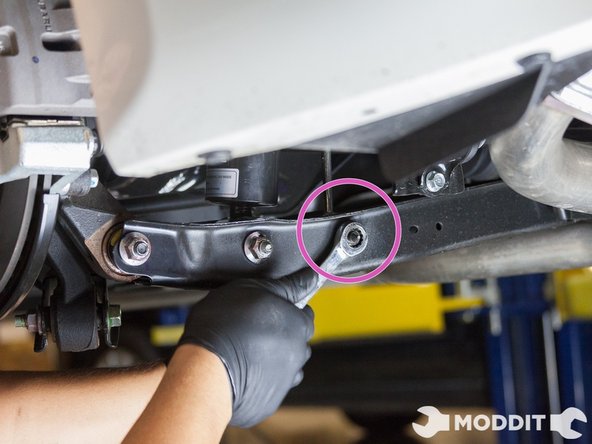
Then we disconnected the rear sway bar end link from the sway bar with a 14mm wrench and 6mm allen wrench to keep the end link from spinning.
-
Next, we removed the end link from the control arm itself with a 14 mm socket and wrench. We did this on both sides so that one side would not have more tension than the other. We found out that doing this reduced the amount of effort needed to remove the lower portion of the stock strut & spring from the lower control arm.
-
If you are doing this by your self than the removal of the link is a must, as you can see in the third image we were trying to force it out and succeeded, but it was way more easier when we took off the sway bar link on the other side.
-
-
-
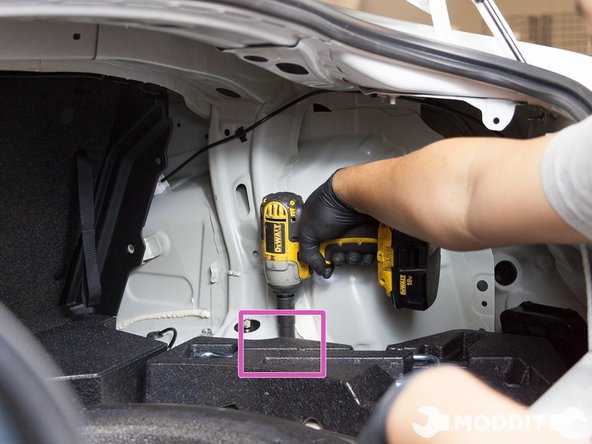
Because the interior panels should already be removed, you can now remove the 14mm top hat nuts located in the trunk.
-
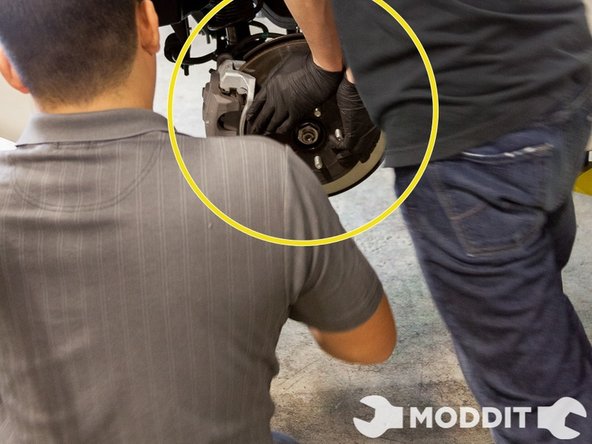
At this point you can begin removing the oem suspension from the car. You will have to put some force on the rear suspension/rear control arm to have enough clearance to remove the OEM strut assembly from the rear. This especially true if one has not removed the sway bar link.
-
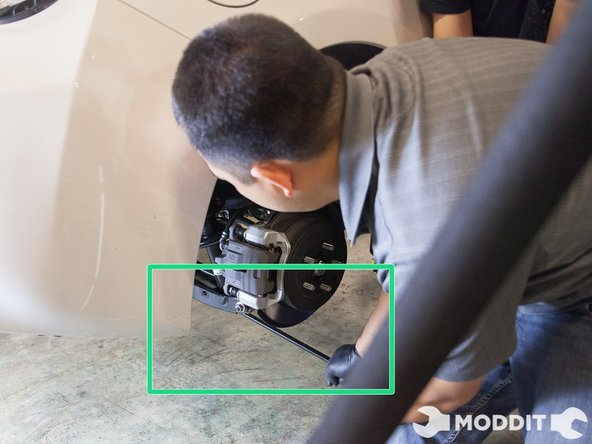
We decided to use a pry bar and pried from the front of the lower control arm through to the sway bar.
-
While one person pried the suspension control arm down (Or in our case our guy literally pushed down and that seemed to work too), another person removed the strut assembly. Again you may have to remove the rear sway bar if you aren’t able to safely remove the stock strut.
-
-
-
Install of the new Rear Stance Coilover is the opposite of removal. We used the included diagrams that came with the coilovers for torque specs.
-
Removal/Installation of the Front Suspension: Once you have the front wheels removed, there are a few things that you need move out of the way before removing the entire front shock/strut assembly.
-
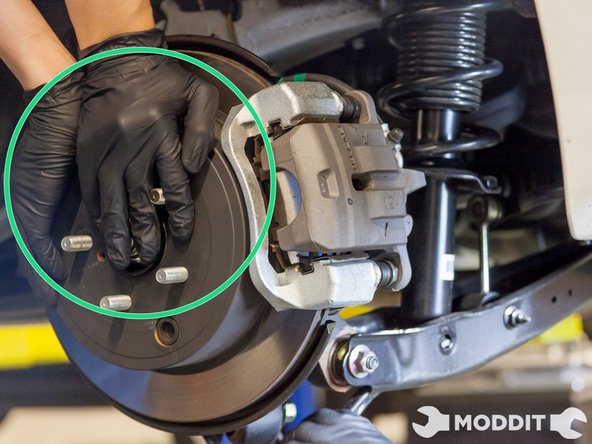
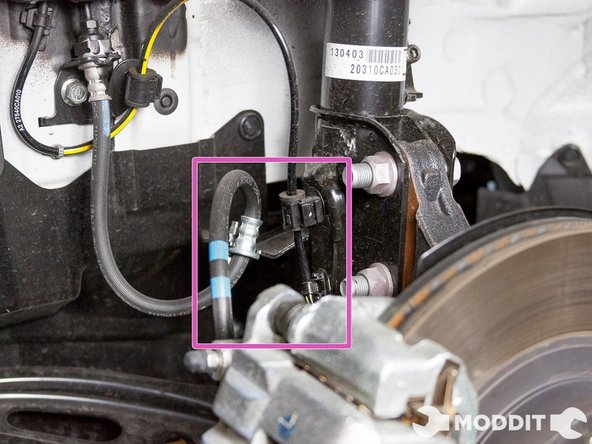
First you have to remove the brake line brackets with a 12mm socket or combination wrench.
-
-
-
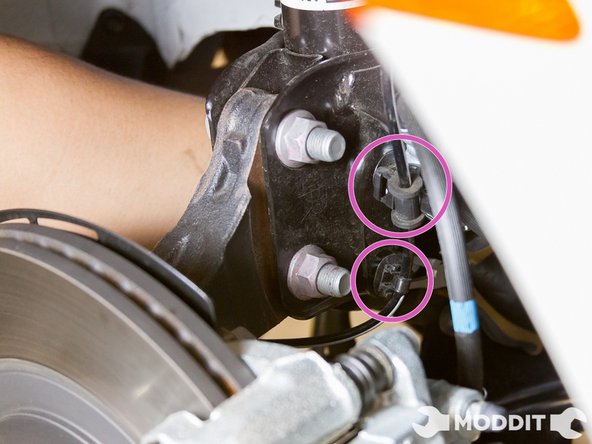
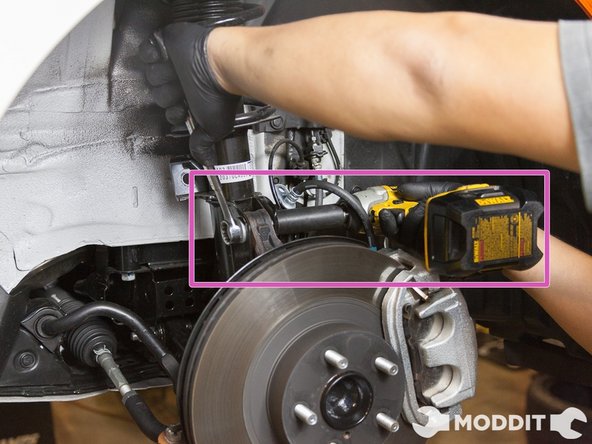
Next, remove the ABS sensor clips located on the oem strut. There are actually 2 clips to the ABS sensor line: one can use a pick, a screwdriver, or even one’s fingers (if possible) to remove the 2 clips holding the ABS line to the strut housing.
-
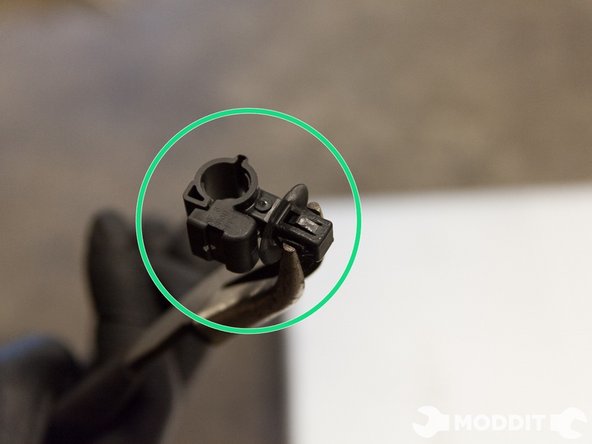
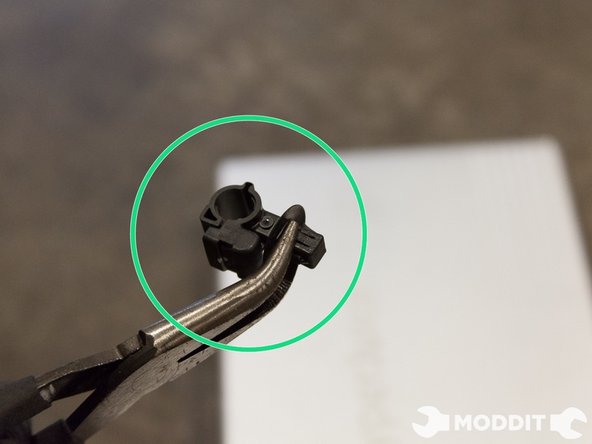
After you manage to take the strut off, remember to also remove these clips with pliers from the strut housing in order to reuse them on your coilovers. We almost tossed them before we realized we needed them. They are quite small and easily forgettable.
-
To remove the entire clip from the stock strut in order to reuse on the Stance coilovers, we have to loosen a 4-way clip that is a completely tricky bastard, you have to pinch the larger two prongs, then the smaller two prongs at the same time to remove it.
-
We would recommend dealing with this clip outside of the car since inside it would be a total pain on the vehicle.
-
-
-
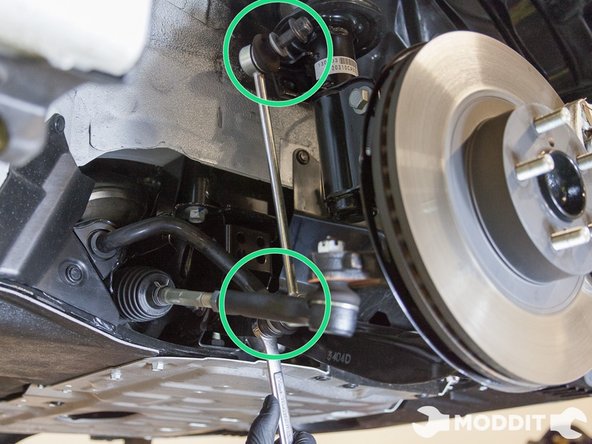
The last small component to remove on the front oem suspension are the sway bar end links. Use a 14mm socket on the nut side and an Allen wrench on the bolt to remove the end links. If you don’t have replacement sway bar end links, then leave the end links on.
-
Stance supplies the extra end links which are a little bit longer to adjust for the small changes in geometry. Since we had new end links in our kit, we removed the oem end links entirely and swapped in the new ones. We then proceeded to repeat this process for both sides.
-
At this point you should find a box, crate, or use the jack (or if you have a friend helping like us, he or she will do) to support the front lower control arm as the whole front oem suspension will soon be disconnected from the stock suspension and fall.
-
Use a 19 mm ratchet on the nut side of the strut housing to spindle bolts and a 19 mm combination wrench to secure the bolt on the opposite side. There are two of these bolts per side.
-
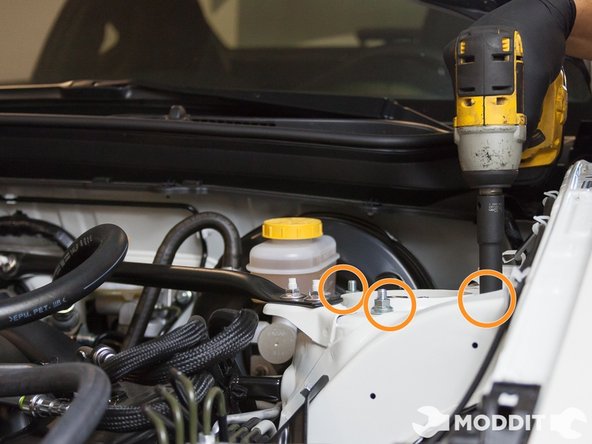
Then proceed to remove the two upper, shock tower bolts, they are 14mm nuts. While holding the strut against the car we remove both of them gently. Here a helper is really useful in order for to maintain the strut in place while you remove it and prevent it from crashing to the ground.
-
-
-
Once you are completely finished removing the front suspension work backwards in order to install the Stance alternative.
-
hopefully this helps other BRZ owners with the installation of their own suspension no matter what brand they go with. Cheers!
-